Monday, December 13, 2021

Sourdough, Persimmon, Pecan Pancakes

 This is descended from a recipe on the Perfect Loaf, which we take extreme liberties with all the time.

Ingredients

Wet:
  • 1 cup of discarded starter (approximately, however much you're throwing out)
  • insides of one extra juicy persimmon
  • approximately 1/4 cup yogurt (maybe more)
  • approximately 2/3rds cups whole milk
  • 2 eggs
  • 1tsp vanilla extract
  • 3 tbsps melted butter
Dry:
  • 1 cup white flour
  • 1/3rd cup wheat germ
  • 1/4th cup sugar
  • 1 tsp baking soda
  • 1 tsp baking powder
  • 1tsp salt
  • 1/4th cup pecan pieces

1. Place the discarded starter in your mixing bowl.
2. In a 2 cup glass measuring cup place the insides of the persimmon, slightly more than 1/4 cup yogurt, and then fill with milk until the total wet ingredients reach the 1 1/4 cup mark. Add the eggs, vanilla extract, and beat until eggs are incorporated. There might be a few persimmon chunks left after incorporating the eggs. Don't worry about it. If you have sensory issues, why are you even eating persimmons?
3. Mix egg, milk, persimmon mixture into the discarded starter in your mixing bowl.
4. Melt the butter.
5. Mix the dry ingredients together.
6. Add the melted butter and dry ingredients to the wet and fold until the dry ingredients are just incorporated. 
7. Cook as you would mortal pancakes on a buttered or greased cast iron griddle or comal.


Sunday, March 5, 2017

Desperate Fauxnkernickel

Fauxnkernickle


For whatever reason I am particularly loath to discard extra sourdough starter, but you can only give it away so many times, and the chickens don't always seem to want it (stupid chickens). What follows is less a recipe and more an act of desperate frugality combined with a child's witches' potion.
Ingredients:
  • all the sourdough starter you were about to throw out 
  • some liquid (filtered water, milk, whey from cheesemaking, cold coffee or tea, a stale beer, whatever), maybe 1/2 to 3/4 of a cup
  • 2 tsp salt
  • some molasses (2 tbsp?)
  • 2 heaping tablespoons cocoa powder
  • optional caraway seeds (if you don't care if your kids spit the bread out of their mouths and regard you with a deep and lasting sense of betrayal)
  • some sort of fat (olive oil, melted butter, coconut oil, lard, tallow, schmaltz, used motor oil,  whichever you grab first), maybe 2 tbsp
  • some rye flour (I don't know how much, just "enough" whatever that is).
  • some whole wheat flour (seriously I don't know) 
  • white flour on hand for kneading
  • a small handful of cornmeal, grits, or semolina for the stone (whatever is around)
Equipment
  • large bowl for mixing and initial proofing
  • wooden spoon
  • a large banneton or other vessel designed to shape and structure the loaf while proofing (this dough is more dense than my usual sourdough pain de campaign, but doesn't mind the help)
  • large baking stone
  • clean kitchen towel
  • bread lame or sharp knife
Magnolia Proofing Bowl

1. Dump all of the random liquid, molasses, cocoa powder, salt, and random fat into a bowl and mix.
2. Dump in the starter you are salvaging.
3. Begin adding flour; maybe a full cup of rye to begin with then whole wheat to round things out. The goal here is to get things to form a ball that holds together, but still becomes tacky on the surfaced when worked for more than a few seconds. Once it forms a good ball I switch to sprinkling white flour, just enough to keep the surface dry enough to work.
4. Knead for a few minutes, just to make sure things are well mixed. Kneading will not help this bread tremendously. There is too little protein in the dough to form many gluten chains, and the abundance of bran particles will probably just cut them anyhow.
5. Flour or oil the mixing bowl, and allow to sit covered with a damp cloth for 2 or 3 hours.
6. Shape into a loaf and transfer to final proofing vessel. At this point you can retard in fridge out of convenience, but it is not necessary.
7. Once nearly doubled in size (about 3-4 more hours) from shaped loaf, bake (slashing the top) on a preheated stone for 10 minutes at 500 ºF (260 ºC) with steam for a crisp crust, followed by 25-30 minutes at 350 ºF (177 ºC).  Bread should sound hollow when thumped on bottom. It will be dense, but pleasantly spongey and chewy (the crumbs practically bounce), good for kids who complain that their honey falls through the holes in the "other" bread.

Weekly Pain de Campagne

Pain de campagne


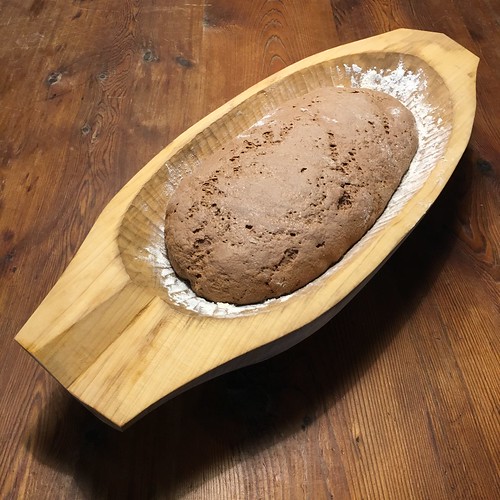
I have given this recipe out often enough recently that it ought to be written out here. This is our weekly to semiweekly country bread. We have two smallish bannetons, so I usually divide it into two loaves, though sometimes I braid it and proof it as a single loaf in our big wooden proofing bowl. This is a slow, slow sourdough. If I start this the moment I get home from work, it is usually ready for Jami and the boys to eat by lunch time the next day. That is not to say that it is particularly labor intensive, just slow. Other than that it is fairly forgiving, tastes great, and is decently sliceable for several days out on the counter (though never better than right out of the oven), and decidedly un-fancy.
Ingredients:
  • 1 cup rye flour
  • 1 whole wheat flour
  • 2 cups white flour
  • 2 cups filtered water
  • 2 tsp salt
  • 1 cup sourdough starter 
  • 1 tablespoon olive oil or other fat (only if needed to oil the container for bulk fermentation)
  • extra white flour for kneading and shaping later on
  • a small handful of cornmeal, grits, or semolina for the stone (whatever is around)
Equipment
  • stand mixer with dough hook
  • measuring cups
  • large bowl for proofing
  • 2 bannetons or other vessel designed to shape and structure the loaf while proofing (this is a fairly loose dough, and will form a sad puddle of bread without some guidance)
  • large baking stone
  • wooden or plastic spatula
  • bench scraper
  • clean kitchen towel
  • bread lame or sharp knife
Day 1: mixing and proofing
1. Make sure starter has been fed and is active at least two hours before beginning.
2. Blend the flours in the mixing bowl, mix in 1 1/2 cups of water, and autolyse for 2 hours (this allows enzymes in the flour to begin breaking the starches down into sugars, rye is very good at this).
3. After 2 hours add the remaining 1/2 cup water with salt dissolved into it.
4. Add starter.
5. Knead on dough hook for ten minutes, stopping occasionally to scrape any of the drier flour mixture from the bottom of the bowl and incorporating it more fully into the dough.
6. Transfer to large oiled bowl and cover with a damp towel for 2-3 hours for bulk fermentation in a reasonably warm part of the house.
7. Pull dough out onto a floured surface to divide and shape into loaves.
8. Place loaves into well floured bannetons.
9. Cover bannetons with a damp towel and place in refrigerator to retard (ferment slowly) overnight.
10.  It's probably close to midnight now. Go to bed.

Day 2: baking
1.  Remove bannetons from the refrigerator, rewetting the towel if necessary.
2. Allow loaves to sit until nearly doubled in bulk from their original size after shaping, keeping in mind that they may have risen somewhat overnight. This is highly temperature dependent. The loaves are obviously cool, and if the house is cool they will warm more slowly and continue to rise more slowly still.
3. Begin preheating stone to 500 ºF (260 ºC) about 30 minutes to 1 hour before baking.
4. Once the loaves are ready, sprinkle some polenta or semolina onto the stone (to prevent sticking), and dump the loaves out of the bannetons onto the stone, slashing the tops once they are in place.
5. Splash some water in the oven if you prefer a harder crust.
6. Bake at 500 ºF (260 ºC) for 10 minutes.
7. Reduce heat to 350 ºF (177 ºC), and bake for 25 more minutes (or longer for a darker crust since that seems to be in vogue nowadays).
8. Bread should sound hollow when thumped on the underside if it is fully cooked.

Thursday, October 13, 2016

Dutch Babies: the Principle (plus apple cardamom option)

Apple cardamom Dutch-baby.


Presented here is the most basic, serviceable version of a German pancake/Dutch baby, with a fully elaborated apple cardamom version (inspired by Jami waving a photo of such a thing at me from her phone, and rather than reading the recipe I thought, "oh, I can do that." So I did.).

The Principle (as a ratio per 2 eggs)
  • 2 eggs : flour 1/3 cup : milk 1/3 cup
  • butter 1-1 ½ tbsp per egg
  • some salt
  • some vanilla extract
Ingredients for Apple Cardamom Dutch Babies
  • 6 eggs, room temperature
  • 1 cup flour
  • 1 cup milk
  • pinch of salt
  • 1 tsp vanilla extract
  • 4-6 cardamom pods, husks removed, seeds ground 
  • ½-1 apple, thinly sliced
  • ¼ cup (½ stick) butter
Equipment
  • mixing bowl
  • whisk
  • 10 inch cast iron skillet
1. Preheat oven and skillet to 415˚F/213˚C.
2. Whisk flour into eggs until fully incorporated.
3. Add salt, cardamom, and vanilla extract.
4. Slowly whisk in milk.
5. Melt butter in preheated skillet.
6. Scatter apple slices in melted butter.
7. Pour batter over apples (they'll float).
8. Bake for 15 minutes.
9. Serve with powdered sugar, or maple syrup, or both, or jam, or anything really.

Tuesday, May 31, 2016

Advisory Cookies

Advisory cookies

This is modified from Jami's mom's chocolate chip cookie recipe. I made cookies for my advisees' birthdays their freshman year. Jami helped out a couple of times, and due to ingredient availability issues (oh no, we're out of butter!) she developed a new and all-together even more delicious version.

Ingredients
  • 1/2 cup (1 stick) butter
  • 1/2 cup coconut oil
  • 3/4 cup sugar
  • 3/4 cup brown sugar
  • 1 tsp vanilla extract
  • 2 eggs, room temperature
  • 2 (+ optional 1/3) cups all purpose flour
  • 1/4 cup whole wheat flour
  • 1/2 tsp salt
  • 1 tsp baking soda
  • bag of semi-sweet chocolate chips
Equipment
  • stand mixer
  • baking sheets
  • spatula
  • cooling racks
1. Preheat oven to 350˚F/177˚C.
2. Cream butter, oil, sugars, and vanilla extract.
3. Add eggs to creamed sugar mixture.
4. Mix remaining dry ingredients together and add slowly to wet ingredients (add extra flour if dough seems too loose).
5. Add chocolate chips.
6. Spoon heaping tablespoons of dough onto baking sheets
7. Bake for 9 minutes.
8. Makes between 36 and 45 cookies (depending on size)

This recipe provided at Brenda's special request. Happy baking!

Thursday, August 9, 2012

"THE Cheesecake"


This is such good cheesecake. The recipe comes from Cooking Debauchery, and is adapted from Cook's Illustrated, but the write up on it includes a pages long exposition on what is wrong with every other cheesecake in the world, making the recipe nearly impossible to read as it requires way too much scrolling and scanning. Here it is made legible.

Ingredients
  • 4 8oz packages of cream cheese, softened
  • 4 eggs, room temperature
  • 1/3 cup kefir cheese
  • 1 1/4 cups sugar
  • 1 tbsp vanilla
  • zest of 1 small lemon, finely chopped
  • butter and additional sugar for the pan
Equipment
  • food processor
  • spatula
  • 9" spring-form pan
  • roughly 18" of 18" wide aluminum foil
  • large roasting pan
  • medium sized pot of boiling water
  • paring or utility knife with a fairly thin blade
1. Preheat oven to 500˚F/260˚C.
2. Place roasting pan in oven and fill with about 1" boiling water.
3. Remove the bottom of the spring-form pan.
4. Wrap foil around the bottom of the botom of the pan such that the completely foiled side is up.
5. Replace the sides of the pan and flatten foil up along the sides to create a water tight seal around the pan.
6. Butter and sugar the inside of the pan.
7. Spread cream cheese and kefir cheese evenly in the food processor and blend briefly.
8. Add sugar and blend.
9. Add eggs and blend until mixture if creamy and consistently mixed.
10. Add vanilla and zest and blend
11. Pour mixture into prepared spring-form pan.
12. Place in roasting pan and pour in additional boiling water if needed. Water should come half-way up the pan.
13. Bake at 500˚F/260˚C for 12 minutes.
14. Reduce heat to 200˚F/93˚C, and open door for a couple of minutes to allow heat to escape.
15. Once heat has gone down, bake without opening the door for 1 hour.
16. Remove pan briefly to run the knife around the edge of the cake to separate it from the wall of the pan. This eliminates cracking on the top of the cake.
17. Bake another 60-75 minutes until the entire cheesecake has a slightly rubbery consistency when shaken.
18. Raise the temperature to 350 and bake until the crust is golden and puffed, about 12 to 20 minutes. Be careful not to over cook it at this point as that will change the texture and mouthfeel of the cheesecake.
19. Remove from oven, pull of sides of pan, and allow to cool to room temperature.
20. Place cheesecake, covered lightly with foil, in fridge and chill overnight.

We'll eat this with chocolate sauce, or blueberries, or sliced strawberries.


Kefir Cheese


This is dead simple if you make your own kefir (which, by the way is pronounced keh-FEER, not KEE-fur, not that I will ever correct you in public, just don't try to correct me).

Ingredients
  • strained milk kefir, any amount under 1/2 gallon
Equipment
  • large bowl
  • cheesecloth, or clean flour sack kitchen towel
  • string or twine
1. Cover the bowl with the cheesecloth.
2. Pour kefir into the cheesecloth/bowl.
3. Gather up the ends of the cheesecloth and wrap them together with the string.
4. Tie the end of the string to the door knob of a cabinet door so the entire bundle hangs over the bowl.
5. Strain for 6-12 hours.
6. Remove cheese from the cloth and refrigerate.
7. Save the whey that has collected in the bowl for lacto-fermented recipes, either in the fridge or freezer.

If the kefir has been in the fridge for a few days and is extra sharp I use the resulting cheese for cheesecake.

Friday, July 27, 2012

Horrid Breakfast Drink


This is my breakfast most days, especially workdays when I wake up as late as possible and chug this stuff with all my old-man pills on the drive to work. It's more like medicine than food. Not recommended, but it does its job.

Ingredients
  • 2 heaping scoops vanilla flavored powdered whey protein
  • 1 heaping teaspoon ground flax meal
  • filtered water
  • hot water
  • 1 heaping teaspoon raw powdered cacao (cocoa powder, but fancy)
  • 2 heaping teaspoon ends matcha powder (yes, the handle of a teaspoon)
  • some ice cubes
  • maple syrup (very optional, and not recommended)
Equipment

1. Dump whey powder and flax meal into the Klean Kanteen (or other similarly sized, sealable, non-reactive container).
2. Fill container less than halfway with filtered water, seal, and shake hard.
3. Dump matcha powder and cacao powder into mug/glass of hot water and stir.
4. Add hot water mixture to container (along with maple syrup if you want this to be palatable, but don't mind loosing out on the supposed weight loss benefit of 30 grams of protein within 30 minutes of waking).
5. Add enough ice cubes to raise water level to just below the neck of the container.
6. Seal and agitate some more.
7. Heaven help you.

At one point I was adding the Nativas superfood blend of hemp, maca, and cacao (thanks to a price mix-up at Wholefoods), but it made my mouth raw. I suspect the hemp, but would have to try it or the maca separately to be sure. I plan on adding freeze dried nettle leaf to the mix next time we do a bulk order from Frontier.

Pretty Good Made-up Bread


This is a totally made-up-on-the-spot recipe. I hadn't made bread in a while, and I'd just strained a batch of kefir, and I had ground flax seed on hand from my horrid breakfast beverage, so this is what happened.

Ingredients (for "sponge")
  • 2 cups warm water
  • 2 tsp yeast
  • 2 tbsp molasses
  • 2 tsp sea salt
  • 2/3 cup strained kefir
  • 1/4 cup ground flax meal
  • 1 cup rye flour
  • 1 cup whole wheat flour
  • 1 cup unbleached bread flour
  • 1/4 tbsp olive oil
Remainder
  • roughly 5 cups unbleached bread flour
  • a handful of cornmeal
  • a splash of olive oil
Equipment
  • measuring cups and spoons
  • a kitchen mixer with bread hook 
  • or a big bowl
  • a damp cloth
  • someplace warm
  • a baking stone (or a baking sheet, if you're lame;)
  • a small ovenproof bowl of water
  • a pizza peel
  • small knife, preferably serrated
1. Sprinkle the yeast and molasses into the warm water and proof (7 to 10 minutes).
2. Mix in the remainder of the "sponge" ingredients. This is a totally fake sponge. Real sponges take at least 12 hours and have a more complex, sourdough-like smell. This is quick and dirty with the kefir added for some microbiological complexity.
3. Set mixture covered in a warm place (I set mine above the water heater) until very bubbly. 1 to 2 hours.
4. Mix in remainder of flour. I'm deliberately vague about the exact quantity. This should be a soft, sticky dough, nearly as sticky a sourdough, but not quite.
5. Knead for 10 minutes.
6. Form in to a ball and transfer to a large bowl that has been oiled with olive oil.
7. Dust top with extra flour and cover with damp cloth.
8. Return to warm place and allow to rise until doubled. About 1 hour.
9. Punch down and return to rise until doubled in warm place, or if you need to slow things down you could put it in the fridge for a while. This will gain you up to 4 or 5 hours on the final rise.
10. Place baking stone and an ovenproof bowl of water in oven
11. Preheat your oven to 415˚ F or 213˚ C.
12. Divide dough and form into two torpedo shaped loaves on a flour dusted pizza peel.
13. Dust loaves with flour and allow them to rest for about 10 minutes.
14. Throw cornmeal onto baking stone and slide loaves on.
15. Slice top of loaf with a serrated knife or wet paring knife (wetting the knife keeps the dough from sticking and pulling, a serrated knife works dry).
15. Splash a handful of water onto the base of the oven (if this won't cause all kinds to nastiness to fly up), or spray water in oven with a mister (avoiding loaves).
16. Bake for 10 minutes then reduce heat to 375˚ F or 190˚ C.
17. Bake another 25 to 35 minutes. This a dark bread already thanks to the molasses and rye and wheat flours, so rather than eyeball it, pick up a loaf and thump the bottom. It should sound hollow.
18. Allow bread to cool before cutting into it. Baking continues for several minutes after it comes out of the oven, and cutting into it while it's hot (it's so tempting, I know!) can ruin the internal structure of the loaf.

This bread is great with butter from happy cows (we get ours locally from Lucky Layla at Lavon Farms, or Kerrygold is a great supermarket alternative), and honey from a backyard hive, or jelly from foraged wild fruits (I made mustang grape jelly a couple of weeks ago). It also makes decent torijas.

Saturday, November 29, 2008

Chicken and Dumplings


I don't know if there's any possible way to make dumpling photogenic, but man they taste good. This recipe by Melody Rhodes, and supplied by Google, has been foolproof so far. My only modification has been to half it to make it fit our miniature family better.

Ingredients
  • 1 cup white flour
  • 2 tsp baking powder
  • 1/2 tsp salt
  • 2 tbsp softened butter
  • 1/2 cup milk
1. Bring 1 1/2 to 2 quarts of chicken soup to a simmer.
2. Mix the dry ingredients.
3. Mix the butter in with a fork.
4. Add the milk, but don't stir any more than necessary.
5. Drop spoonfuls of dough into the simmering chicken soup.
6. Cover for 10 minutes.
7. NO PEEKING!

Options: Double the recipe of course if you're feeding more than three people, and you might check out the variations on the original recipe for sweet dumplings or raisin dumplings.

Tuesday, October 21, 2008

Chorrizo and Apples Foilpack


Sheer coincidence and a random stop at the Walmart in Midland brought this breakfast together. J and I had the same idea; as I was laying the first apple slices in she called "Add some apples!"

Ingredients
  • 1 package of chorrizo
  • 4 to 6 apples
1. Slice the apples into eighths and layer on the foil.
2. Place the chorrizo over the apples.
3. Wrap the bundle in three layers of foil.
4. Cook over hot coals, 15 minutes per side.

Thursday, July 17, 2008

Fairytale Pumpkin Soup


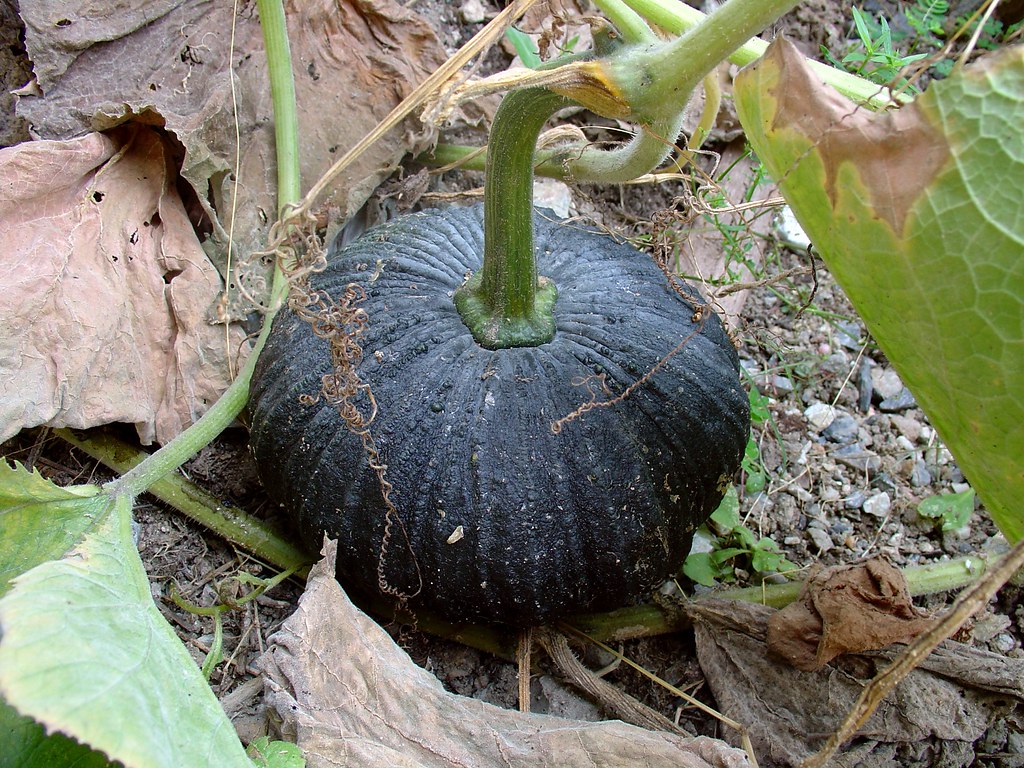
One day we threw some seeds out the kitchen window, and overnight (it seems) we had a pumpkin patch. It makes for a lovely view while washing dishes, and in a pinch fed us and two friends. Jami used the leftovers to make this soupy Thai dessert:

Ingredients
  • 1 cup coconut milk
  • 1/2 water
  • 1/4 of a pumpkin, peeled and cubed
  • a pinch of salt
  • brown sugar (or palm sugar if you can find it) to taste
1. Heat the coconut milk & water in a saucepan over low heat.
2. Add the pumpkin, salt & sugar.
3. Cook until the pumpkin is tender. Serves 4.

Monday, April 28, 2008

24 Hour Ginger Beer


Jami makes this ginger beer recipe every once in a while. It is quite good, though shown somewhat inconsistent appreciation by those outside our intimate circle of two. Last night we introduced it to some dear friends who actually liked it, so I'm posting this for their sake. I believe she got the recipe from Martha Stewart, but I won't swear to it. All I know is that it's not our creation.

Ingredients
  • 2 lbs fresh ginger root
  • 2 quarts boiling water
  • sugar to taste
  • soda water (optional)
1. Peel and grate the ginger. Grating can be done in a food processor or with a coarse cheese grater.
2. Place the grated ginger in a non reactive bowl (that means glass or ceramic), and pour the boiling water over it.
3. Loosely cover the bowl with foil for twenty-four hours. You want air to get in, but nothing to drop out of the sky into your drink.
4. After twenty-four hours strain out the grated ginger and compost it.
5. Refrigerate then sweeten to taste. Cut the ginger beer with soda water if you need to. I usually need to.


Friday, November 9, 2007

Best, Creamiest Papier Mâché Paste ever


Important update (as of 4/26/17) for comment-section-complainers coming to this 10 year old (!) recipe from some random Pinterest board: this is a wheat paste recipe, sometimes we southerners call it "payper mushay" paste (we also call anything fizzy and sugary a "coke", even if it's a Dr. Pepper, which is the best kind of coke, btw). I am so sorry if that is confusing. If you are sad, instead of complaining, please google "paper clay recipe" or just go here: http://www.ultimatepapermache.com/paper-mache-clay. A colleague uses this recipe and it is legit. You're welcome.

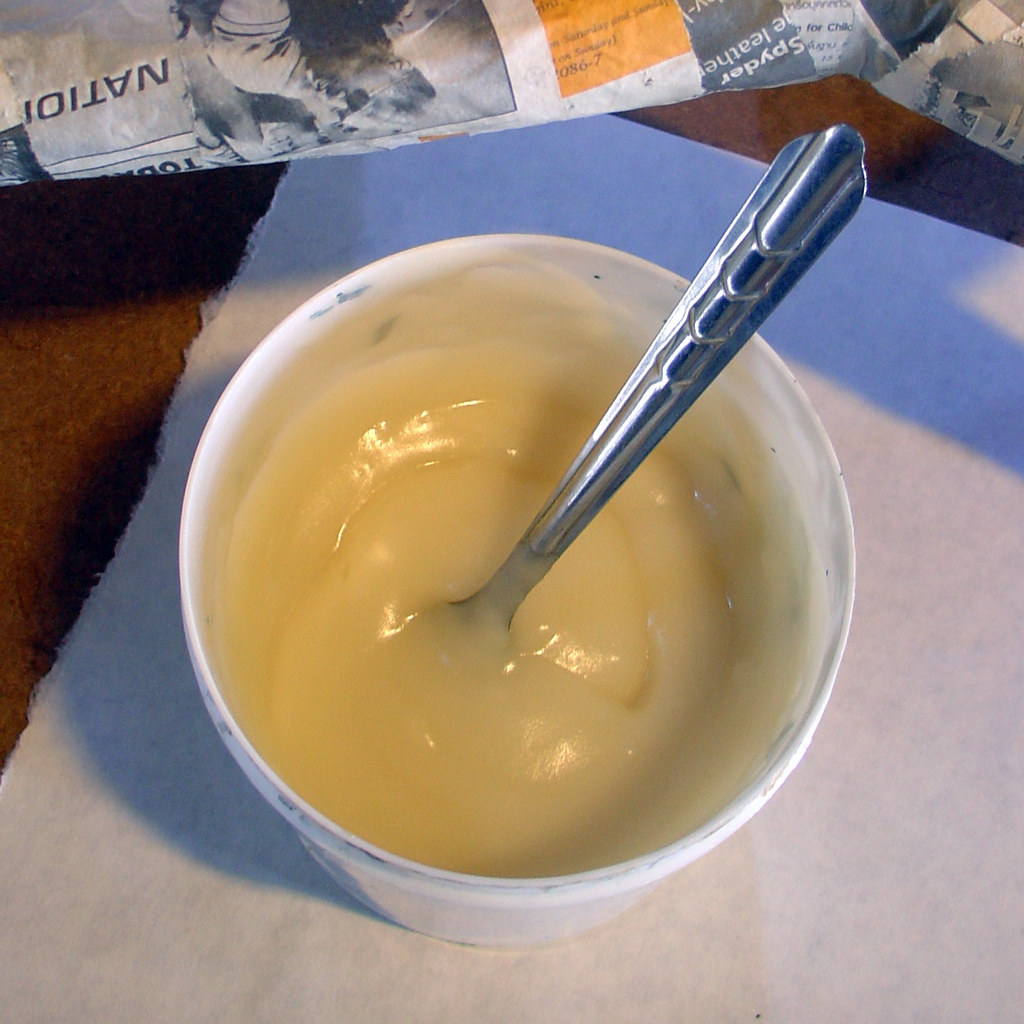
I've made many, many batches of papier mâché paste (wheat paste) in the past year, and most recipes are lacking in a number of ways, they're lumpy after a night in the fridge, and never quite recover, or they start out lumpy, or they turn stinky way too soon. I've finally settled on a recipe of my own invention that is lumpless, mold resistant, is just as good the third day out of the fridge as it was straight off the stove, and always creamy. The real key here is the rice flour, so don't imagine you can leave it out and still expect the best, creamiest papier mâché paste ever.

Ingredients
  • 1/3 cup flour
  • 2 tbsp rice flour
  • 2 tsp salt
  • 1 tsp baking soda
  • 2 cups boiling water
  • 1 cup cool water

1. Mix the dry ingredients.
2. Mix in the cool water with a fork or whisk, adding the water a little at a time to keep it as smooth as possible.
3. Stir the flour mixture into the boiling water.
4. Allow it to boil for two or three minutes.

Options: After a night in the fridge just stir it up with a fork. It's even nicer if you heat it.

Sunday, October 21, 2007

Pizza Dough


It's been a while since we've been able to make pizza, but the other weekend we spent all of Saturday at the home of our friends AZ and D, and pizza was the result. I had fun shopping for toppings with the girls (D's daughter, her niece, and their live-in school buddy). The ham, peppers, tomatoes, broccoli, carrots, mozzarella, and Parmesan pizza above is their creation (Thai kids actually like vegetables). The adults had anchovies and pepperoni.

Ingredients
  • 2 cups warm water
  • 2 tsp yeast
  • 2 tsp sugar, or honey, or molasses (optional)
  • 2 tsp salt
  • 3 tbsp olive oil, or lard
  • 5-7 cups high protein flour
  • a handful of cornmeal
Equipment
  • a big bowl
  • a damp cloth
  • someplace warm
  • a baking stone (or a baking sheet, if you're lame;)
1. Sprinkle the yeast and your sweetener of choice into the warm water. For a longer rise time (and a richer flavored crust) use only 1 tsp of yeast.
2. Let the yeast proof. If it's in good shape it should start to foam a bit after seven to ten minutes.
3. Add the salt.
4. Add your fat of choice. If using lard you might want to soften it a bit.
5. Mix in one cup of flour. Don't worry about lumps.
6. Begin mixing in the rest of the flour, use your hands once it begins to get stiff. The 5-7 cups is exactly approximate. Just make sure the dough is good and stiff before you start kneading.
7. Transfer your dough to a clean working surface, dusted with flour.
8. Knead for about 10 minutes, adding more flour if the dough gets sticky. If you have kids around this is a great time to let them get their hands dirty.
9. Put the dough in a clean, oiled bowl, with plenty of head room. Cover the bowl with a damp cloth, and leave the dough in a warm place until it has doubled in size. Depending on how much yeast you used this should take 45 minute to 1 hr and 1/2.
10. Preheat your oven to 400˚ F or 205˚ C. If you're using a stone you should throw it in there.
10. Punch the dough down and knead it again for a minute or two. If I'm making pizza for just two people I usually cut it the dough in half at this point and freeze one of the halves.
11. Roll or throw the dough into your desired shape.
12. Sprinkle cornmeal onto your baking surface, and slide your dough on. I usually coat it with some olive oil at this point.
13. I hope you have toppings ready.
14. Bake for 25 to 30 minutes, until the crust begins to brown.

Options: All by itself this dough makes great focaccia.

Thursday, October 18, 2007

Easy Chocolate Pudding


I don't know where Jami found this pudding recipe, but it's easy and fast, and I like it just fine.

Ingredients
  • 1/4 cup cocoa powder
  • 1/3 cup sugar
  • 3 tbsp corn starch
  • a pinch of salt
  • 2 cups milk
  • 1/2 tsp vanilla extract

1. Mix the dry ingredients.
2. Whisk in the milk.
3. Stir over very low heat until the pudding begins to thicken.
4. Add the vanilla extract.

Options: Try adding a little cinnamon.

Thursday, March 29, 2007

Food, Ethics & the Environment


Princeton University has the audio from a conference, held last November, concerning ethical food on its podcast feed. Since they're Princeton, they were able to coax a number of the big names into speaking on the panel. The first session features Peter Singer, professor of Bioethics at Princeton, and Eric Schlosser, author of Fast Food Nation. Marion Nestle, author of What to Eat An Aisle-by-Aisle Guide to Savvy Food Choices and Good Eating, and Gary Nabhan, speak in session two. They discuss healthy eating and local/regional foods. In session three Becky Goldburg, Gidon Eshel, and Paul Shapiro talk about collapsing fisheries, climate change, and animal welfare. Michael Pollan, author of The Botany of Desire and The Omnivore's Dilema, and Bob Langert, McDonald's Vice President for Corporate Social Responsibility, talk in session four, while session five is dedicated to a panel from the Princeton community and the discussion of their own strivings for ethical food practices. All in all it is an excellent introduction to issues regarding the ethics of our food system, and a number of the speakers give good suggestions for individual action on those fronts.

Tuesday, March 27, 2007

Shortbread


When I was a kid my mom had some sort of party (Tupperware?) at the house. We kids had to stay in our room, but our dad sneaked back bars of shortbread for us. No shortbread has ever tasted as good as those clandestine cookies, but that doesn't keep me from trying every once in a while. I usually use the basic Scotch Shortbread recipe from The Joy of Cooking, so here it is with some variations garnered from Chocolate and Zucchini.

Ingredients
  • 1 cup/227 grams salted butter, somewhat softened
  • 1/2 cup powdered sugar
  • 2 cups flour, or substitute 1/4 cup with cornmeal or rice flour
  • pinch of salt (if needed)
  • insides of a vanilla bean, or zest from a Meyer lemon (optional)
Equipment
  • mixing bowl
  • whisk
  • big spoon
  • 9x9 baking pan or near equivalent
  • fork
1. Preheat oven to 325˚F/160˚C.
2. Cream the sugar and butter with the whisk or a fork.
3. Mix in the rest of the dry ingredients. Unless it's hot the dough should be somewhat crumbly and stiff. If not add a little extra flour.
4. Press the dough into the pan and prick it with the fork every half inch or so.
5. Bake for 30 to 40 minutes until golden.
6. Cut into bars or wedges immediately upon removing from the oven. Cool completely before removing from the pan.

Options: Chocolate chips or nuts, pecans especially, are nice with short bread. You can mix them into the dough, or press them into the dough after you prick it with a fork. That's my preference. You can also sprinkle crystal or turbinado sugar over the top before baking. These make a great breakfast with hot chocolate or tea, if you plan on having a sluggish morning.

More options (added 27 April 2008): I'm experimenting with lavender sugar, which I intend to add to this recipe if it works out. However, a pinch of lavender added to the butter and sugar while they're mixing mixing makes for a lightly lavender flavored shortbread, which is just delicious.

Healthier (‽) Powdered Sugar


We try to avoid refined sugars so that when we do use sugar we can at least pretend it's not doing us any harm. Powdered sugar was the major stumbling block, but no longer.

Ingredients
Equipment
  • blender or food processor with a spice attachment, or coffee mill
1. Pulse.
2. And pulse.
3. And pulse, and pulse, and pulse.
4. As the sugar becomes a powder its cohesion increases, and it will begin to climb the sides. If it starts to hit the top of the spice attachment, that's probably good enough. In the picture above it's almost to that point.

Options: I wonder if you could do this with sucanat? Or granulated maple sugar? That would be weird.

Sunday, March 25, 2007

Tomate Frito


This is a typical Spanish tomato sauce, and it was all I used when I lived in Spain. When I couldn't find it back in the States I sadly put it out of my mind hoping that the inferior, over-sweet flavor of Hunt's or Hill Country Fare would again become familiar. I don't know why it never occurred to me to make it myself. Probably the fact that tomatoes are outrageously expensive in the States, while I can get 3 kilos for 25 ฿ (about 70¢) here in Thailand. I'll have to talk J's Papa into growing more Brandywines for me (no one there likes to eat them since they look lumpy).

Ingredients
  • 3 kilos/6.5 lbs of ripe tomatoes
  • 5 tbsp olive oil
  • 1 tsp salt
  • 1 tbsp evaporated cane juice
  • 1 garlic clove
  • a sprig of parsley or basil
Equipment
  • 2 sterile quart jars or 4 pint jars
  • large pot
  • sieve
  • knives and stuff
  • blender
1. Seed and chop the tomatoes. Save the seeds so you can strain the juice back into your chopped tomatoes.
2. Add the oil to the pot, then the tomatoes and everything else. Don't bother chopping the garlic or parsley.
3. Heat to a boil, stirring and mashing the tomatoes occasionally.
4. Reduce heat to a low simmer and cover for 30 minutes. Continue stirring and mashing.
5. Run it through the blender, and mix the results (it will take 3-4 batches) for the sake of homogenization.
6. Can the results. Since this is an acid food all it needs is 10 minutes in a boiling water bath.

Options: You can render a chopped onion or two in the oil before you add the tomatoes. Some recipes call for a dash of pepper. Use this like you would any tomato sauce. You'll never go back.

Yum, wolf-peaches.